At first I was trying to use only Emperor and Empress doll pictures but I only manage to find Empress doll picture with a good resolution. I was kinda devastated at first but then I have a new thought for a plan B to use the whole altar of dolls with cherry blossom trees at the background.
First of all, I create an A4 size file with 72 resolution and name it as 'Festival - Hinamatsuri' but I have to rotate the canvas to a vertical view. My reason is that I want a sort of portrait feeling for my e-wallpaper.


Then, I open up my cherry blossom trees picture and drag the name bar into the workplace so I can drag the cherry blossom trees picture into my e-wallpaper file.


I do not wanted the road to be my center viewpoint so I have to adjust the picture slightly to left.

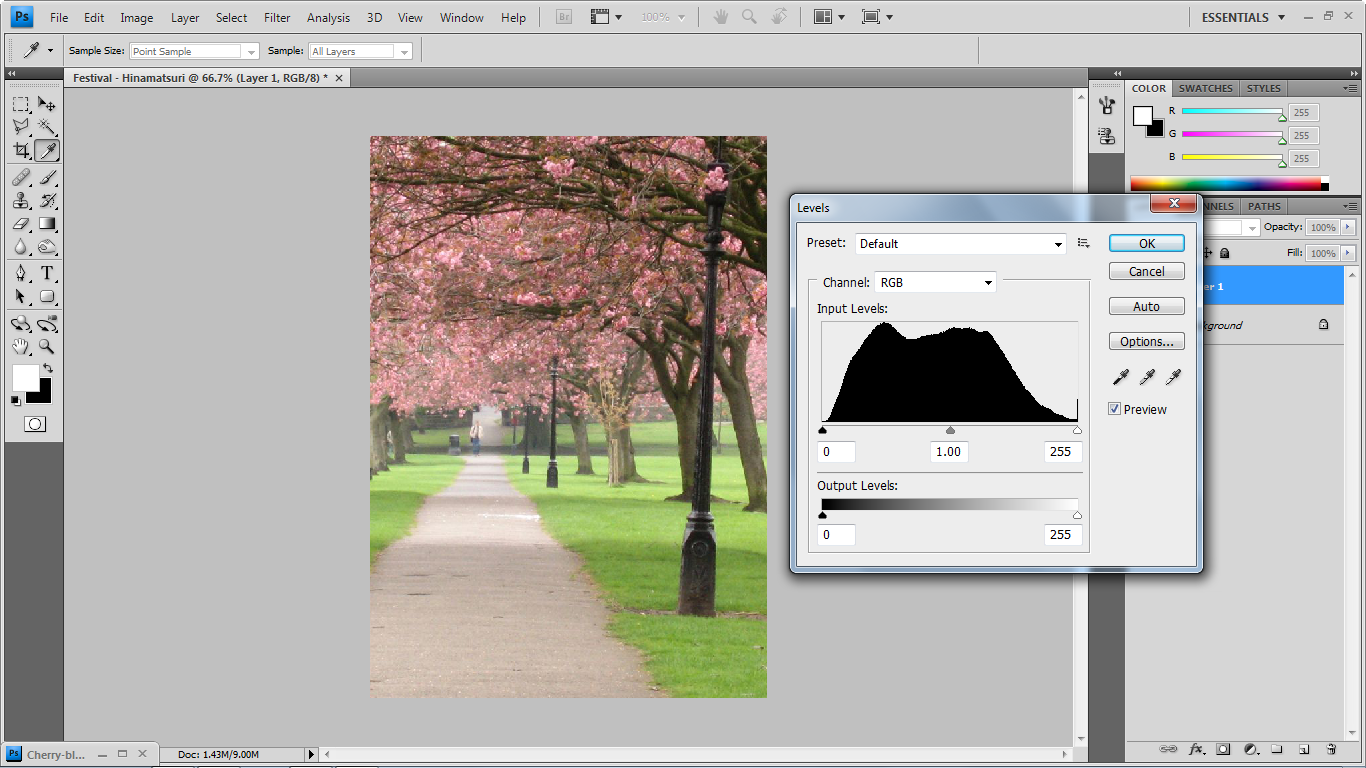
Next, I have to adjust the Layer 1 which is also the cherry blossom trees background level by going to 'Image >> Adjustment >> Levels' to darken more the picture.


On the other file, I have open the dolls with altar picture and use Magnetic Lasso Tool to trace the line around dolls and use the same method as above to drag the picture before I have to resize it by using shortcut 'Ctrl + T'.


After that, I create a new layer beneath Layer 2 and use Polygonal Lasso Tool with black Paint Bucket to create a shadow below the altar. Then, I will use a Blur tool to soften the shadow.


Going back to Layer 2, I have to go to 'Image >> Adjustments >> Curves' to darken the altar.


Then I create a new layer above Layer 2 to make lamp stand glows. By that, I have to choose a warm mixture of yellow and orange colour and using a labeled '300' airbrush before reducing the brush opacity.


I create another file above Layer 4 and use Gradient tool with purple colour before I set the layer option to be 'Overlay'. I even repeat the process but this time I am using pink colour gradient and set the layer option as 'Screen'.


Back to Layer 2, I need to use Blur tool since the edge of the altar looks very edgy.

I start to write a text of the festival name including the festival date above and use 'Drop Shadow' and 'Outer Glow' to enhance the text more. To ensure that I will have the same effects on both texts since it is separated, I have to use 'Copy Layer Style' and 'Paste Layer Style'.


As a finishing touch, I have reduce the shadow opacity and lighten the texts more.