Thursday, May 12, 2011

Computer graphic 3 (Group project, Assignment 3, process)


Open Adobe Illustrator > pen tool > draw the shape of phone by using pen tool > go to fill > insert colour
Repeat the same step using the same tool > draw a drum and it's stick > filled colour


Start > programme > Audacity > file > import > audio or press ctrl + shift + I > select file > click the Selection Tool > drag the desired part > It is easier to edit when splited, use shortcut Ctrl+Alt+I or manually go to Edit > Split New > repeat the same step by selecting the last part of the music > Delete the middle part of the music by clicking the small 'x' icon next to the name of the music > Selection Tool > select the end of the first part of the music > Effect > Fade Out > select the second part of the music and Fade In, Effect > Fade In > repeat the same step to it does not sound awkward


Open Adobe Flash > file > new > select actionscript 3.0 > select ok >
go to Properties > saiz > select Edit > dimension : 550 px (width) x 400 px (height) > press ok


properties > stage > choose coolour #FED402


File > import > import to stage or ctrl + R > select file > press open > the file will be automatically transfer to the 'library' > drag the file anywhere on the stage> once you draged, it will be disappeared but it will appear at the timeline


All the words will be converted into a symbol : select word > press ctrl + F8 on your keyboard > create new symbol will pop up > add name , type : movie clip, Folder : library root > press Ok > the symbol will appear at library


To create motion on your stage used keyframe on your timeline > select one point on the timeline > right click > insert keyframe > drag symbol to your stage > gray line will appear with a black dot > go to the next frame at the same layer repeat the same step > move the symbol at other place on the stage > press ok > the symbol will create motion


To create motion used motion tween : select one point > right click > insert keyframe > drag symbol to your stage > gray line will appear with a black dot > right click > click create motion tween > gray line will chance to blue line > select any point on the blue line > move your symbol > dotted line can be seen on your stage > small diamond shape will appear at the blue line > do the same step to create verity motion > press ok to play


Name all the symbol at timeline layer > double click > rename > press enter on keyboard > file > save as > select place > ok

Monday, April 4, 2011

Assignment 2

My 'One Malaysia' poster theme is under icons/symbols and it is about the Malaysia National flower; Bunga Raya or known as hibiscus in English. Bunga Raya was chosen by our first Prime Minister, Tunku Abdul Rahman. Symbolically, Bunga Raya's red colour represents courage and each of the flower petals represents the five National Principles.

1. I have set the stage at 320x240 px with 12 frames per second but I later change it into 24 frames per second since it is too short.


2. 'File' >> 'Import' >> 'Import to Library' to transfer my Assignment 1 poster into the stage. I also change all the layers into movie clips.


3. Due to difference size of my Assignment 1 (A4 size) and the stage size, I have to resize them by 'right click' >> 'free transform' so they can fit inside stage and I have to adjustable the layers position.


4. To start, I have insert and convert five National Principles' text into symbol.


5. I have decided to use 'Alpha' effect for my typography. At the first frame of each Principles, I have use 'right click' >> 'create motion tween' >> 'Colour Effect' and insert 'Alpha' by decreasing the opacity to 0. Then at the somewhat in the middle, I will use the Alpha effect again but this time I have to increase the opacity to 100.


6. For the Malaysia flag, I have imply blur effect on it. Instead of create motion tween at first frame in flag layer, I have to do it at the middle of the frame since it is easier to work with. Simply 'right click' >> 'Create Motion Tween' >> 'Filters' >> 'Properties' >> 'Blur'. For the middle frame, I have set the blur value to be 0 in high quality. After settle it, I move toward first frame and use the same effect but I change the blur value into 20 in high quality.


7. The last effect I will use is 'glow'. Similar to 'blur' effect, I just use 'right click' >> 'Create Motion Tween' >> 'Filters' >> 'Properties' >> 'Glow'. I only make the colour adjustment from red to yellow with 200% blur strength for first frame while in the middle frame, I have change the colour from yellow to white with 100% blur strength. I done the effect for both 'Whereas Our Country' and 'Malaysia' layer.


Wednesday, January 12, 2011

Calendar : April 2011

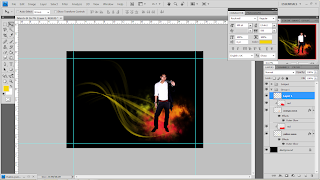
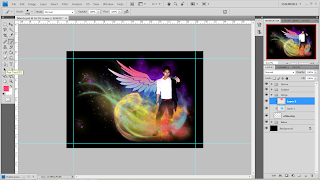
In my previous post, I have stated that my March calendar is 'Fallen Angel, while for my March calendar, the title is 'Passion Angel'.


At first this is just only sample but after I consult with my other group members, they wanted me to use this one and unfortunately I didn't do any screenshots for it. So, I have to explain how do I done it and luckily, the method I use is very similar with the one I done for my March Calendar.

At first, I have to cut the picture from the photo that we shoot earlier in our assignment and then transfer it into the A4 size with 300 dpi using RGB in Photoshop. Then I need to retouch the model so the white line around it won't visible to viewer eyes.

The next step I going to do is similar to what I done in March calendar, only a few different brushes but I have use the same texture to lighten my work.

Calendar : March 2011

My sub-theme of the calendar I'm going to make is 'Angel in Fantasy'. For March it's going to be a 'Fallen Angel' because he only have one wing and it's not solid compare to the angel in my April calendar. Below here is the step by step screenshots of how I make my 'Fallen Angel in March'.